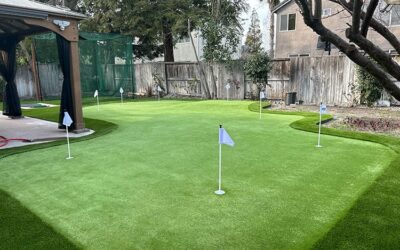
If you are thinking about installing a backyard putting green for yourself, there are some mistakes that you should avoid. It is not difficult to install the best putting greens but it can be costly if you make the wrong decisions and have to start over. In this blog post, we will cover the most critical mistakes that people make when installing their backyard greens themselves.

Top Mistakes When Installing the Best Putting Greens
Making mistakes when installing artificial grass for a putting green are not that hard to prevent. However, if you want your golf course in the back yard to turn out as well or better than those putting mats, then there will be some work involved. So here are top mistakes you should avoid when installing an artificial turf putting green.
-
1. Don’t cut corners.
Avoid cutting corners when installing your artificial turf putting greens by not skimping on quality materials, the best artificial grass accessories and tools and workmanship. This is too important an area of your property to cut any costs.
-
2. Don’t skimp on the installation process.
You should be careful about where you lay your turf so that it drains properly and doesn’t end up in a puddle of water after an especially heavy rainstorm. The last thing you want is for the course to turn into a swampy mess simply because of poor planning.
-
3. Using the wrong kind of turf.
It’s important to use the best artificial turf that is specifically designed for putting greens. If you are installing an outdoor green and live in a cold climate, it should be polyethylene with ULTRA VIOLET REACTIVE (UVR) foam backing. You might also want to consider using landscaping fabric under the turf to prevent weeds.
-
4. Not starting at one end.
Don’t start your project by installing only a few pieces of artificial grass and then moving on to another area. It’s best to work from one end of the green all the way to the other in order to minimize seams that will often show up with these projects.
-
5. Cutting the turf too short.
It’s important to leave about a half inch or so of backing material behind, otherwise your putting green might not have as much “give.” The best way to do this is by using a utility knife and level. If you are unsure what type of cutting tool would work best for you, talk with your local artificial grass supplier.
-
6. Starting too close to the house
You should select a spot that is at least five feet away from any structures, such as your home or garage. If you are installing an outdoor putting green, it’s best not to install it under trees because this can cause holes in the turf and make for more difficult putting.
-
7. Installing with a slope.
This is also known as “non-level ground.” It’s best to install your green in an area that has no more than a one-inch drop per foot, which equates to about 25% grade.
Ready to get started? Contact your trusted suppliers of the best artificial grass and accessories today for your DIY putting green project!